Everything You Need to Know About Calligraphy Inks, Paint & Pigments: The Complete FAQ Guide
(!) Seriously nerdy alert: Whether you’re a beginner wondering what’s actually in your ink bottle or an experienced calligrapher experimenting with new mediums, you’ll find practical solutions and insights that make your creative process smoother and more enjoyable. Got more questions not covered below? Get in touch and ask away!
If you are a complete beginner, I recommend reading this article
about calligraphy inks
first.
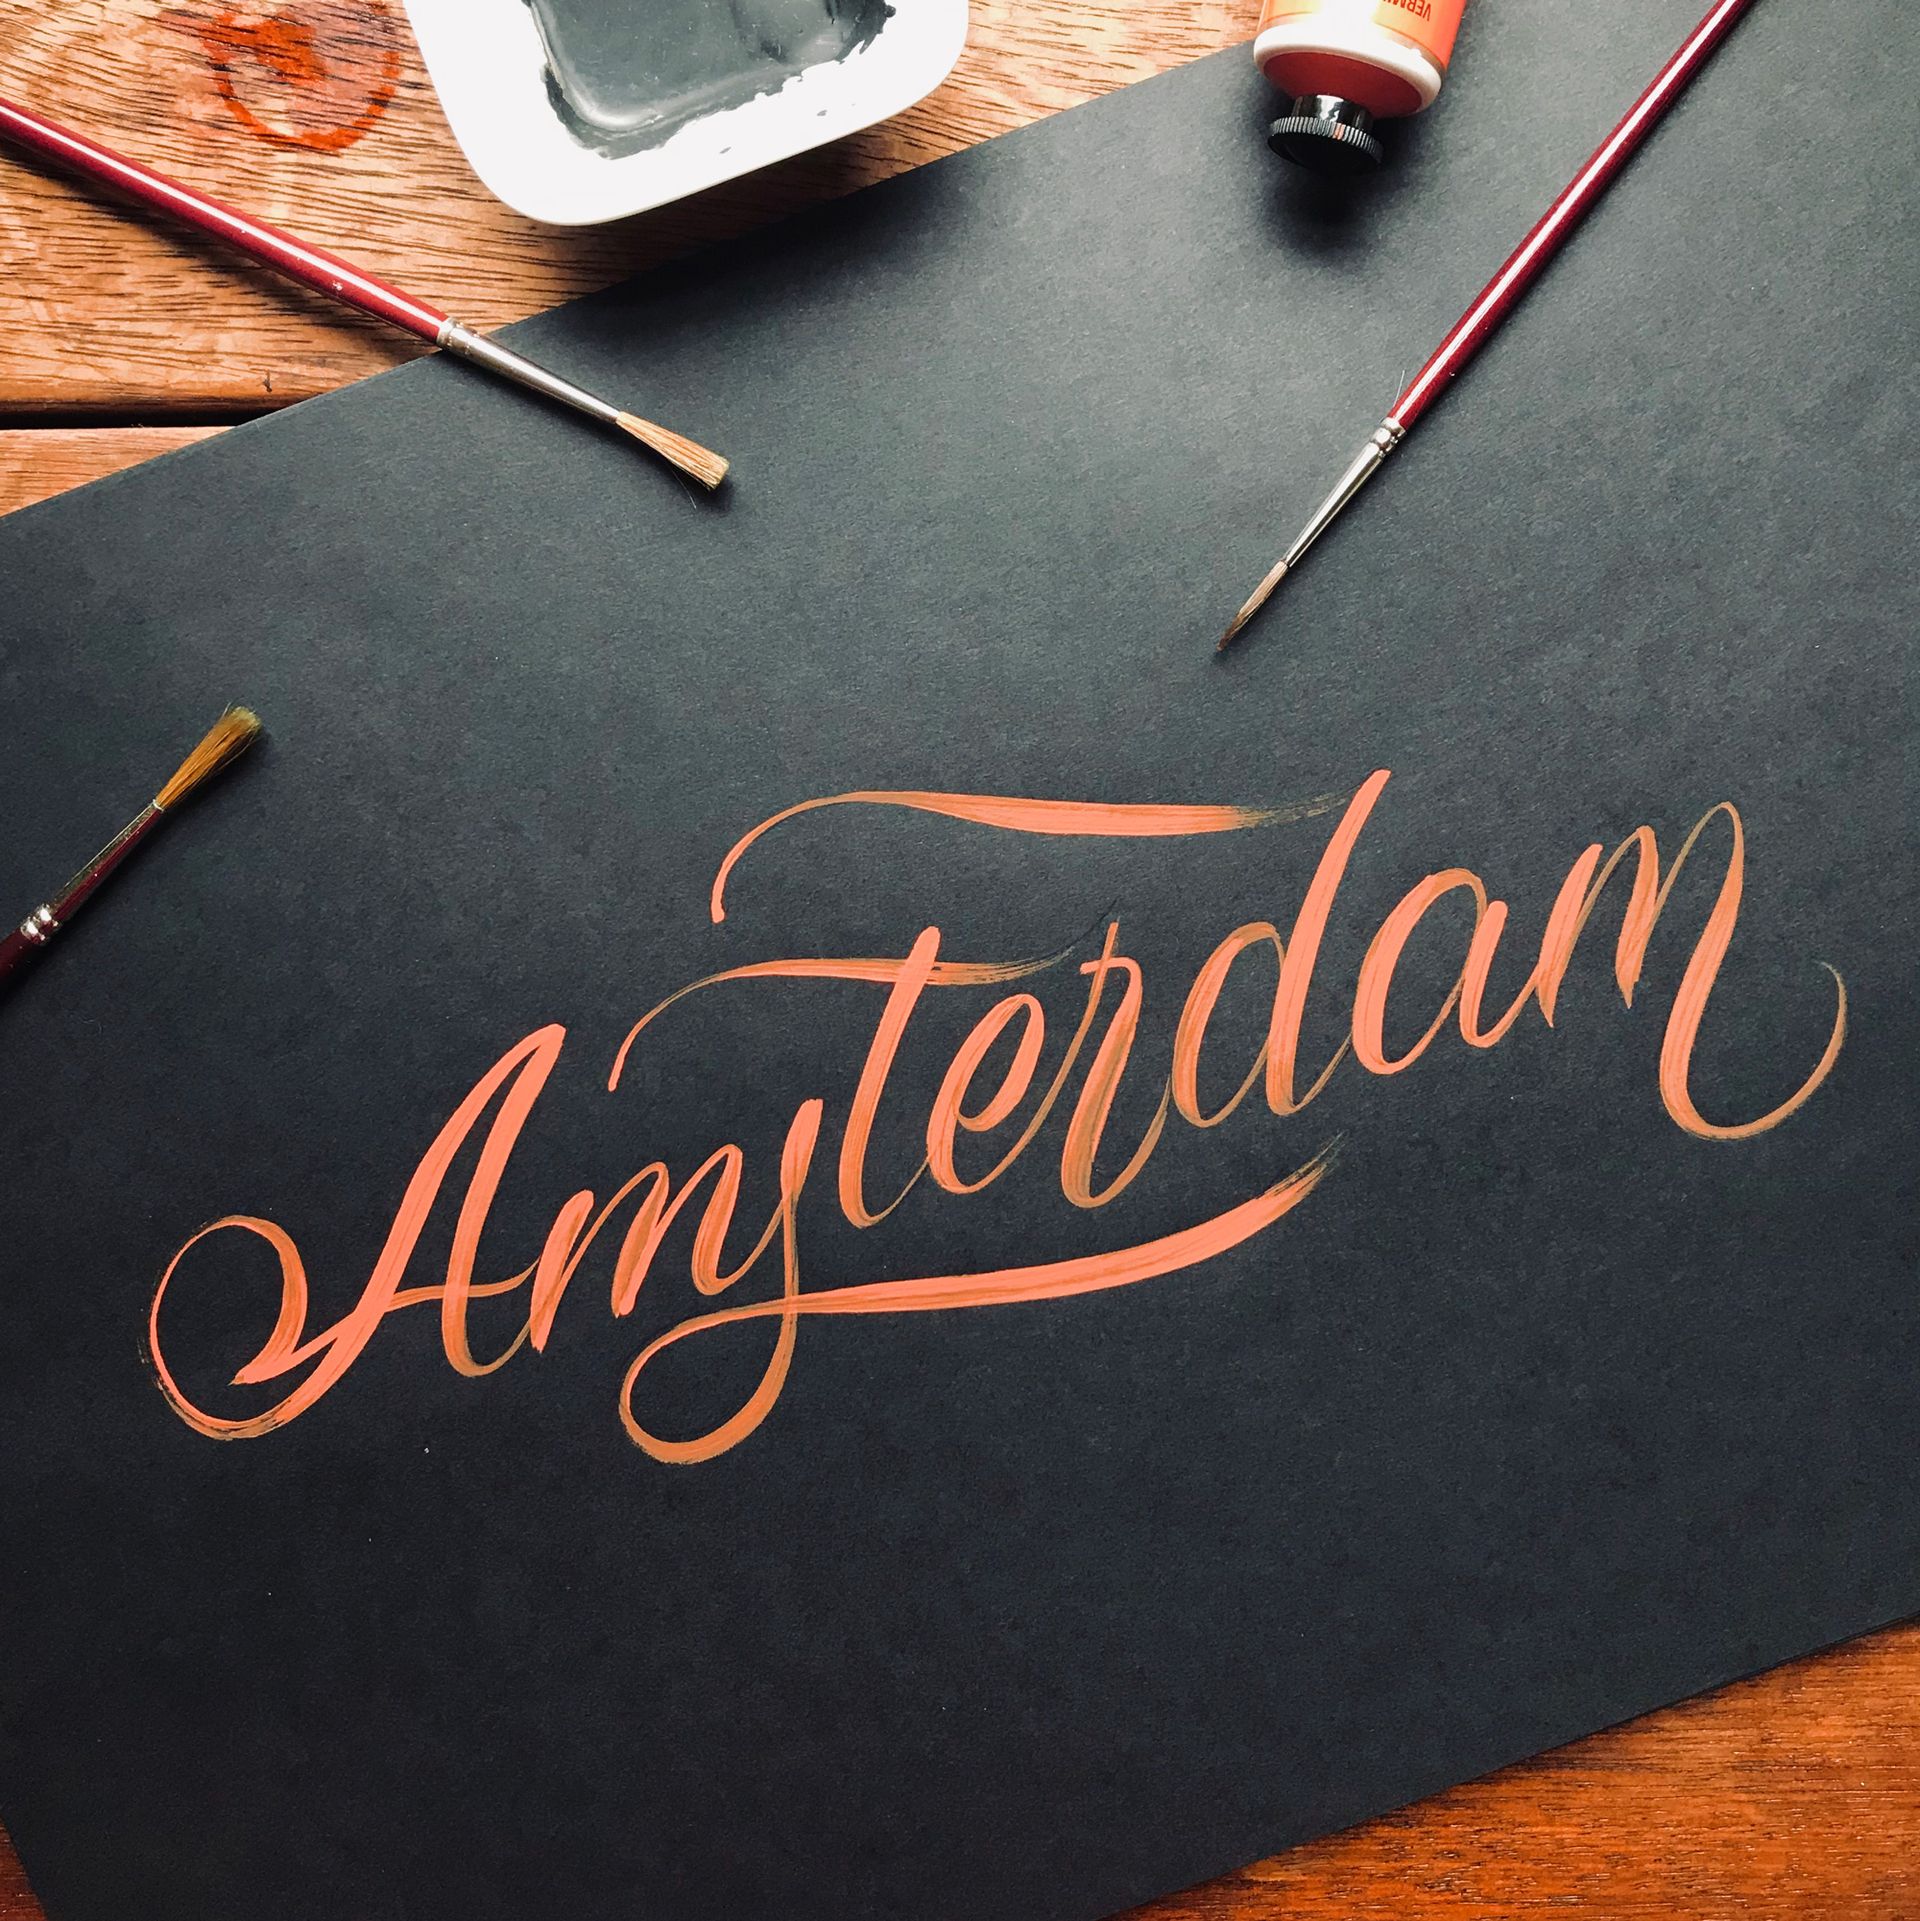
Photo credit: 'Amsterdam'
Brush calligraphy using Jo Sonja's acrylic paint and a sable ox round brush by Maria Montes.
What’s Actually In Your Ink Bottle? Understanding Inks, Paint & Pigments
Calligraphy inks are liquid mediums specifically formulated for writing instruments. They typically contain colorants (either dyes or pigments) suspended in a liquid carrier with binders to help adhesion to paper. The quality and composition of these inks can dramatically affect your lettering results, from how smoothly they flow from your nib to how they appear on different paper types. Examples of calligraphy inks are Vallejo and Talens Ecoline Liquid Watercolours.
Calligraphy paint like gouache and watercolour are pigments mixed with binders (usually gum arabic) that can be diluted with water to achieve ink-like consistency. While they require more preparation than ready-to-use inks, paints offer incredible colour variety and opacity control that many calligraphers prefer for finished pieces. Examples of calligraphy paint are Talens and Winsor & Newton gouache paint.
Pigments are the actual colouring particles found in both inks and paints. Some products are pigment-based, offering long-lasting, lightfast results, while others are dye-based, providing vivid colours but with more tendency to fade over time. Understanding this difference helps you choose the right medium for your project’s intended lifespan.
What’s the difference between dye-based and pigment-based mediums?
Pigment-based mediums contain tiny particles of colour suspended in the liquid, like microscopic pieces of coloured sand floating in water. While they might appear slightly less vibrant initially, these physical particles are much more lightfast and suitable for work you want to preserve long-term. The trade-off is that pigment-based mediums can sometimes settle in their containers and require stirring, and they may behave differently on various paper types.
Dye-based mediums have their colours dissolved completely in the liquid carrier, similar to how sugar dissolves in coffee. This creates brilliant, transparent colors that often appear more vibrant initially. However, these dissolved dyes can fade when exposed to light over time, making them less suitable for archival work. Most fountain pen inks fall into this category.
3 Pigment-Based Inks & Paints (lightfast, water-resistant when dry, archival):
- Dr. Ph. Martin’s Hydrus Fine Art Watercolors
- Liquid watercolour made with lightfast, artist-grade pigments
- Great for brush calligraphy or pointed pen (with dilution)
- Ziller Inks
- Acrylic-based, waterproof, pigmented inks
- Popular for pointed pen calligraphy and broad-edge nibs
- Finetec/Coliro Pearlcolours
- Mica-based metallic and shimmer paints
- Activated with water and applied with brush or nib; pigment-based with high opacity
3 Dye-Based Inks & Paints (vibrant, non-lightfast, often not waterproof):
- Dr. Ph. Martin’s Radiant Concentrated Watercolours
- Brilliant, liquid dye-based colours
- Great for vibrant effects but not lightfast (will fade over time with light exposure)
- Talens Ecoline Liquid Watercolours
- Dye-based, fluid, and very vibrant
- Ideal for practice or digital scanning, but will fade in sunlight
- Winsor & Newton Calligraphy Inks (some colours)
- Some shades (like Blue or Apple Green) are dye-based
- Flow beautifully in dip pens but not all are waterproof or fade-resistant
What’s actually in different types of calligraphy inks?
The composition of your ink affects everything from flow characteristics to longevity.
- Sumi ink combines soot with shellac to create that smooth, velvety black that's perfect for practice and finished work alike.
- Walnut ink typically contains pigmented water from boiled black walnuts mixed with gum arabic as a binder, creating that beautiful earthy brown that many calligraphers adore.
- Iron gall ink has a fascinating historical composition including iron sulfate, tannins from oak galls, and water. This combination creates an ink that actually darkens as it oxidizes, meaning your work develops richer tones over time.
- India ink uses carbon black pigment with either shellac or acrylic binder, while most fountain pen inks are dye-based with water as the primary carrier.
It’s worth noting that not all inks are vegan-friendly. Some use animal glue as binders, and shellac comes from lac bugs. If this is a concern for you, research ingredients before purchasing, as many manufacturers now offer plant-based alternatives.
Getting Your Inks Ready to Write
Can I make my own calligraphy ink?
Creating your own calligraphy ink opens up a world of unique colours and textures that commercial products can't match. Coffee creates beautiful warm brown tones with interesting texture variations, while wine produces gorgeous burgundy colours (though they're not lightfast for permanent work). Tea offers various shades depending on the type and strength you choose, from pale amber to deep reddish-brown.
For more permanent options, you can boil black walnut hulls to extract natural pigment for homemade walnut ink, or dilute tube watercolours to ink consistency for an economical source of any colour imaginable. The key is ensuring your homemade medium has the right viscosity for your nibs and won’t clog or damage your tools.
How do I properly dilute thick inks and paints?
Proper dilution is crucial for achieving the perfect consistency for smooth writing. With commercial inks that have thickened due to evaporation, add water gradually using a dropper, stirring gently between additions. Test the consistency on scrap paper before committing to your final piece, as it's much easier to add more water than to remove excess.
When working with gouache, start with the paint and add water drop by drop until you reach a light cream consistency. Mix thoroughly to avoid streaks in your lettering.
For inks that have completely dried and become jelly-like, patience is key. Add small amounts of distilled water and stir gently, allowing time for the medium to reconstitute fully.
What’s the proper way to load different nibs?
Loading techniques vary significantly depending on your nib type and chosen medium. For pointed flexible nibs, use a brush to carefully load ink between the tines, or dip directly if working with thinner inks. The key is avoiding overloading, which leads to blobbing and poor line variation. Clean your nib regularly during extended writing sessions to maintain consistent flow.
Broad-edge nibs require a different approach entirely. Always use a brush to load paint or thick ink rather than dipping, which can cause overloading and uneven flow across the nib's width.
For
brushes working with any medium, load directly from your palette or bottle, ensuring metallics are thoroughly mixed before application.
Automatic pens work best when you brush medium onto the blade rather than dipping, giving you better control over ink distribution (more on
calligraphy pens).
Photo credit: Fia Yang via Unsplash
Troubleshooting Calligraphy Ink Common Problems
Why is my ink blobbing or flooding on the paper?
Ink blobbing typically results from an overloaded nib combined with paper that’s too absorbent for your medium. When you notice flooding, immediately tap off excess ink and blot your nib on scrap paper before continuing. Sometimes the issue stems from ink that’s too thin for your paper type, which you can remedy by adding a binder like gum arabic or switching to a thicker medium altogether.
Paper choice plays a crucial role in preventing blobbing. Highly absorbent papers will pull ink from your nib faster than you can control it, leading to irregular line weights and messy letterforms. Switch to bleedproof, marker, or hot-pressed paper for better ink control (more on my types calligraphy paper).
Writing speed also matters; maintaining a steady rhythm prevents ink from pooling while you pause between strokes.
My ink won’t flow smoothly. What’s wrong?
Poor ink flow frustrates even experienced calligraphers, but it's usually fixable once you identify the cause. If your ink has thickened beyond ideal consistency, dilute it gradually with water until it flows smoothly from your nib. Sometimes the problem lies with a dirty nib that’s accumulated dried ink or paper fibres, requiring thorough cleaning with soap and water.
New nibs often come with manufacturing oils or protective coatings that prevent proper ink adhesion. Remove these by gently cleaning with toothpaste, dish soap, or even your own saliva, which contains natural enzymes that dissolve oil residues.
Paper texture can also impede flow, so switch to smoother surfaces if you’re experiencing consistent problems. Finally, check your writing pressure; flexible nibs especially require a light touch to function properly.
Why is my ink bleeding or feathering?
Ink bleeding and feathering occur when your chosen medium spreads beyond your intended strokes, creating fuzzy, unprofessional-looking edges. This problem almost always stems from incompatible ink and paper combinations, where the paper absorbs liquid too quickly for the ink to maintain crisp lines. The solution often involves changing either your paper choice or your medium (more on calligraphy glossary terms).
Bleedproof, marker, or hot-pressed papers provide the smooth, less absorbent surface that most calligraphy mediums need to perform well. If changing paper isn’t an option, try adding gum arabic to thin inks to reduce their absorption rate, or reduce the amount of ink you're loading onto your nib.
Some ink and paper combinations simply don't work well together, so don’t hesitate to experiment with different pairings.
My metallic ink won’t flow properly. Help!
Metallic mediums present unique challenges because the metallic particles tend to settle quickly and can create inconsistent flow. Always mix metallic inks or paints thoroughly before each use, as even brief periods of sitting can cause separation. If your metallic medium seems too thick, thin it slightly with water, but be conservative as over-dilution can reduce the metallic effect.
Loading technique becomes critical with metallics.
Use brush application rather than dipping, as this gives you better control over the amount of medium on your nib. Keep your palette moist during extended work sessions to prevent the metallic particles from drying and becoming unusable. Consider working in shorter sessions with metallics, cleaning and reloading your nib more frequently than you would with regular inks.
How do I fix ink that’s dried on my nib?
Prevention works better than correction when it comes to dried ink on nibs. Mist your palette regularly during work sessions and clean your nibs frequently, especially when using fast-drying mediums like acrylics. However, when dried ink does occur, gentle treatment preserves your nib's delicate tip.
Soak the affected nib in lukewarm water to soften dried ink, then use a soft toothbrush to gently remove stubborn residues. Avoid using sharp objects that can damage the nib's carefully shaped tip. For particularly stubborn dried ink, wash with dish soap after the initial cleaning. Taking time for thorough cleaning prevents long-term damage and maintains optimal nib performance.
Why do I get rust on my nibs?
Rust develops when metal nibs are exposed to moisture combined with certain chemical conditions, such as the acidic nature of iron gall ink. Poor storage conditions, inadequate cleaning, or leaving ink on nibs for extended periods all contribute to rust formation. Once rust appears, it can permanently damage your nib and affect ink flow.
Prevention requires immediate cleaning and drying of nibs after each use, especially when working with acidic mediums. Store clean, dry nibs in low-humidity environments, and consider using rust-preventive oil for long-term storage. If you frequently use acidic inks like iron gall, invest in stainless steel or gold nibs that resist corrosion better than standard steel options.
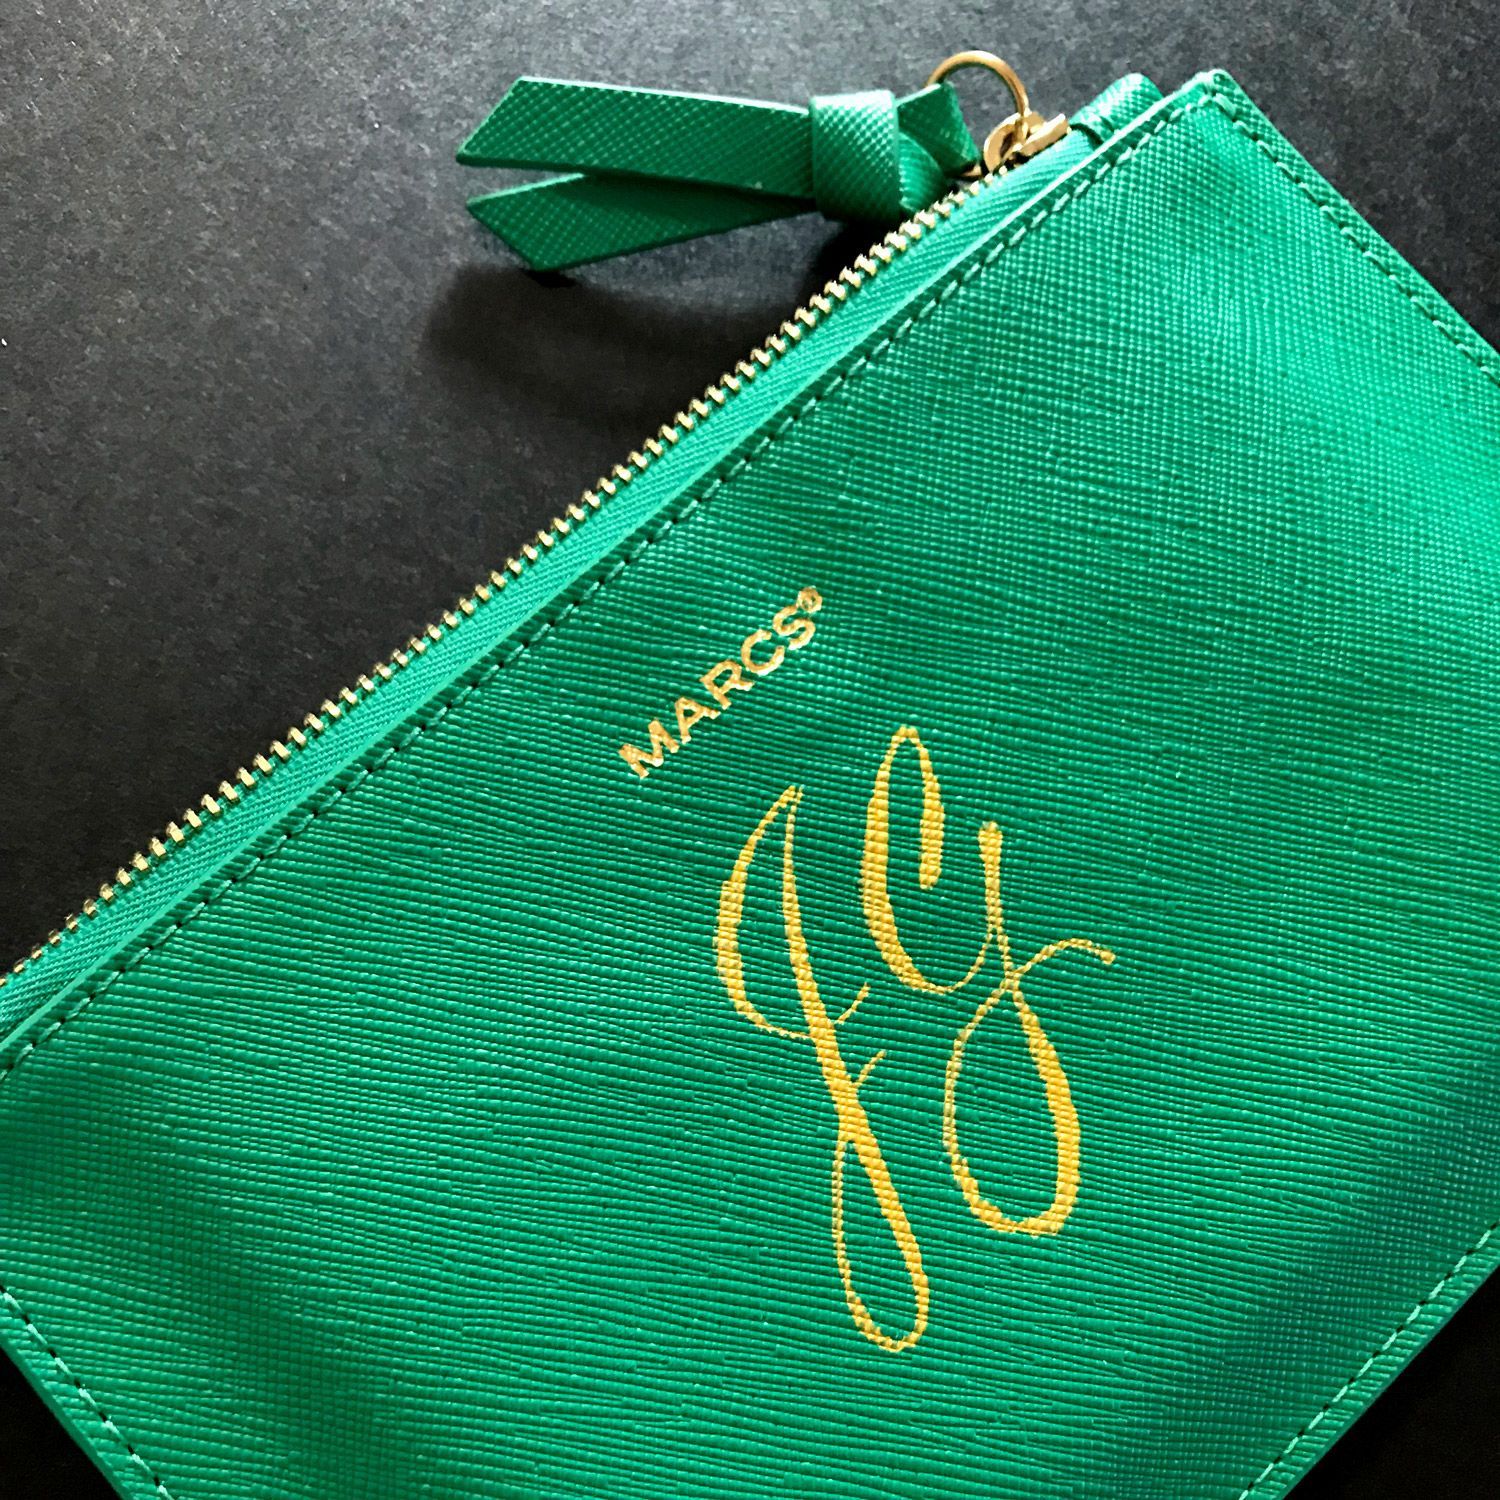
Photo source: 'JG' initials written with a pointed brush and Lumiere Acrylic paint for the luxury brand Marcs.
Calligraphy Compatibility and Mixing
Can I use fountain pen ink with dip pens?
While it’s possible to use fountain pen ink with dip pens, the results often disappoint due to consistency differences. Fountain pen inks are formulated to be much thinner than ideal dip pen mediums, leading to inconsistent strokes, poor line variation, and ink that runs off the nib too quickly for controlled lettering.
The solution involves modifying fountain pen ink by adding a small amount of gum arabic to thicken it to more suitable consistency. This modification transforms the ink into something closer to traditional calligraphy ink while maintaining the color characteristics you desired. Test your modified ink on practice paper before using it for final work, adjusting the gum arabic concentration as needed.
Can I use dip pen ink in fountain pens?
This combination rarely works well and can damage your fountain pen. Most calligraphy inks contain larger pigment particles specifically designed for the open flow systems of dip pens. These particles can clog the intricate feed systems and narrow channels inside fountain pens, potentially causing permanent damage to the pen's mechanism.
Only use inks specifically labeled as fountain pen compatible in your fountain pens. These specially formulated inks provide the color variety you want while maintaining the proper particle size and flow characteristics that fountain pens require. When in doubt, contact the manufacturer to verify compatibility before risking damage to an expensive fountain pen.
Is it safe to mix different inks and paints?
Mixing mediums can create beautiful custom colours, but successful combinations require understanding the underlying chemistry. Water-based mediums generally mix well with other water-based products, while combining different chemical bases (like water-based with alcohol-based or oil-based) often produces unpredictable and sometimes unusable results.
Staying within the same brand family usually offers the safest mixing results, as manufacturers formulate their products with similar base chemistries. Always test mixtures on scrap paper before using them for important work, as some combinations may appear fine initially but develop problems as they dry or age.
Successful combinations include mixing different watercolours together, combining gouache with watercolour, or adding white paint to any water-based medium for opacity control.
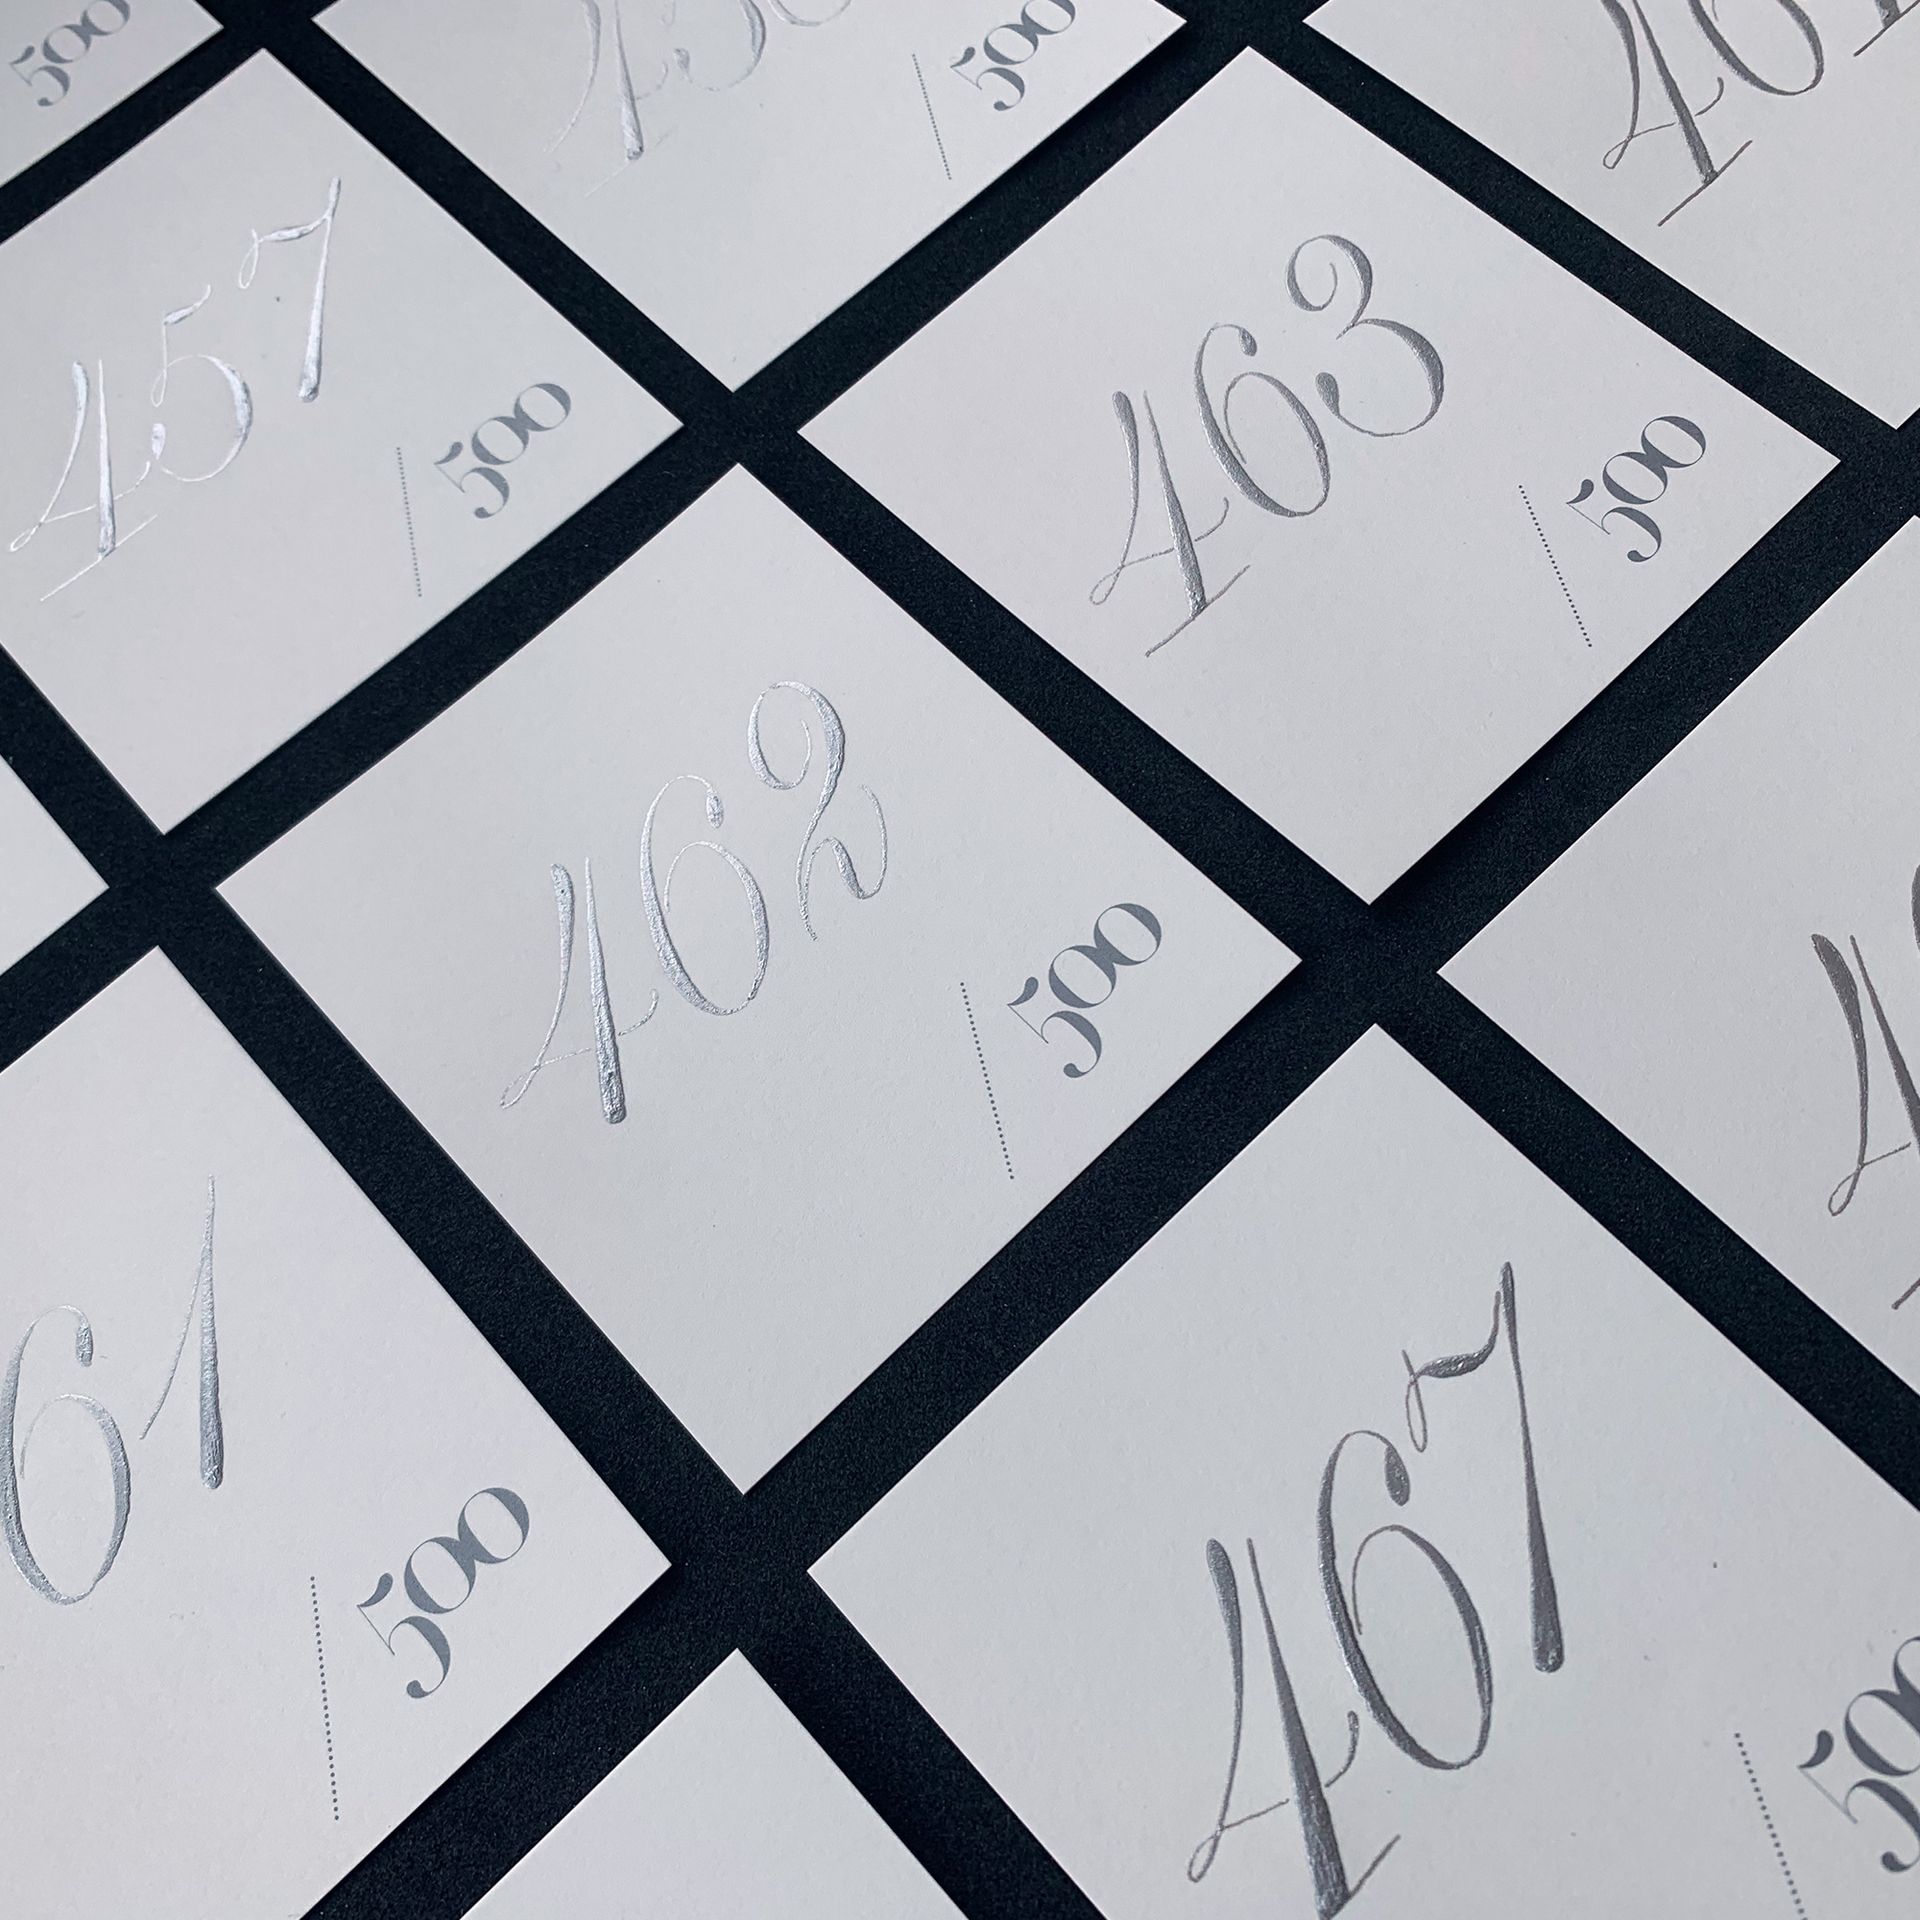
Photo credit: Custom Copperplate numbers for a limited edition for the Biennale of Sydney 2025 using Winsor & Newton metallic silver ink.
Calligraphy Ink Storage and Longevity
How should I store my inks and paints?
Proper storage dramatically extends the life of your calligraphy mediums and ensures they’re ready to use when inspiration strikes. Airtight containers prevent evaporation and contamination while keeping your mediums at the correct consistency. Always store containers upright to avoid messy spills when you open them, and choose cool, dry locations away from temperature extremes that can affect medium stability.
Light exposure can fade or deteriorate many mediums over time, so dark storage areas work best for long-term preservation. Consider transferring bottled inks to small, wide-mouth jars for easier nib access during work sessions. Keep all mediums safely away from children, and label any containers you transfer to avoid confusion later.
Do calligraphy inks expire?
Quality calligraphy inks can last for years or even decades with proper care, though they may require occasional maintenance. Signs that indicate potential problems include mold growth (which means immediate disposal), separation that may be fixable with thorough stirring, or dried and cracked surfaces that are often reconstitutable with careful water addition.
Some inks develop a jelly-like texture as water evaporates, but this doesn’t necessarily mean they're unusable. Regular use helps prevent settling and separation, while proper dilution when needed extends usable life significantly. Store your mediums properly and use them regularly rather than saving them for special occasions, as active use actually helps maintain their quality.
How long does ink take to dry?
Drying times vary considerably based on multiple factors including humidity, paper type, ink thickness, and the specific medium you're using. Quick-drying options like sumi ink and Ziller typically set within minutes, while thicker mediums like Bleed Proof White can take ten minutes to become touch-dry and several hours to cure completely.
High humidity environments significantly slow drying times, while absorbent papers speed the process. Thicker applications of any medium naturally take longer to dry than light washes. As a general safety rule, allow overnight drying before erasing pencil guidelines, as this timeframe accommodates most climate variations and ensures your ink won't smear during cleanup.
Safety and Health with Different Calligraphy Ink Types
Are calligraphy inks poisonous?
Most modern calligraphy inks are formulated to be non-toxic for normal use, but certain precautions make sense for any art material. Iron gall ink contains iron compounds that can be harmful if consumed in quantity, while some industrial or specialty inks may have ingredients you'd want to avoid ingesting. Always check safety information when purchasing new products, especially if you have specific health concerns.
Basic safety practices include keeping all art materials away from children, avoiding ingestion of any medium regardless of its safety rating, and washing hands thoroughly after use. Ensure good ventilation when working with strong-smelling mediums, and be particularly cautious with any product that creates noticeable fumes during use.
Travel and Transportation
How can I travel with my inks?
Successful travel with calligraphy supplies requires different strategies depending on your transportation method. When driving, keep all containers upright and secure them to prevent spills from sudden stops or turns. Pack liquid containers in leak-proof bags as an extra precaution, and avoid leaving supplies in vehicles during temperature extremes that could affect medium consistency.
Air travel presents unique challenges due to TSA liquid restrictions. Never pack liquid inks in carry-on luggage, as they'll likely be confiscated at security checkpoints. Instead, use dry watercolor palettes that are TSA-friendly and can be activated with water at your destination. If you must transport liquid mediums, pack them securely in checked luggage with plenty of protection against leaks and pressure changes.
Calligraphy Paper Compatibility
What paper works best with different mediums?
Paper choice can make or break your calligraphy project, as different mediums perform best on specific surface types. For daily practice with pointed pen work, Canson XL Marker paper provides the smooth, bleedproof surface that allows you to focus on technique without fighting paper texture. Broad-edge practice benefits from slightly more textured options like Torreón laid paper, which provides just enough tooth for good ink adhesion without catching your nib.
When using Pilot Parallel Pens, bleedproof or marker paper prevents the feathering that can occur with fountain pen inks on absorbent surfaces. For finished pieces, hot-pressed watercolor paper offers a smooth surface that handles wet media beautifully, while Bristol board excels for precise work requiring crisp edges. Avoid rough or highly textured papers that can catch nibs and create inconsistent ink flow.
Calligraphy Corrections and Mistakes
How can I fix smeared ink or erase mistakes?
While prevention remains the best strategy, mistakes happen even to experienced calligraphers. When they do occur, several correction methods can salvage your work depending on the type of error and medium involved. For wet ink smears, immediately blot with clean paper to absorb as much ink as possible before it sets permanently.
Once ink has dried, gentle scraping with a craft knife can remove the top layer of paper along with the unwanted ink. This technique requires practice and patience to avoid damaging the paper surface.
For small errors, opaque white paint can provide coverage that allows you to re-letter over the mistake. Sometimes the most creative solution involves turning mistakes into decorative elements that enhance rather than detract from your overall design. Always test correction methods on practice paper first to understand how they'll affect your chosen paper and medium combination.
Advanced Calligraphy Ink Techniques
How do I create gradients and colour transitions?
Beautiful colour transitions elevate calligraphy from simple lettering to artistic expression. The wet-on-wet technique involves applying a second colour while your first colour remains damp, allowing the two to blend naturally on the paper. This creates organic, flowing transitions that work particularly well with watercolour-based mediums.
The dilution method offers more controlled results by gradually adding water to create lighter tones of the same colour within a single piece.
For dramatic effects, try loading your nib with different colours simultaneously, allowing them to mix and separate naturally as you write. A damp brush can also blend colours while they're still wet, giving you control over transition areas and achieving effects that look painterly rather than purely calligraphic.
Can I make any calligraphy waterproof?
Even water-soluble calligraphy can become permanent with the right treatment. Applying a fixative like Microglaze over completely dry lettering creates a protective barrier that prevents water damage while maintaining the visual appearance of your original work. This technique proves invaluable when you want to add watercolor washes around existing lettering without causing the text to bleed or blur.
The key lies in ensuring your original calligraphy is completely dry before applying any fixative, as trapped moisture can cause problems later. Test the fixative on practice pieces first to ensure it doesn't alter the colour or appearance of your chosen medium. This technique opens up exciting possibilities for mixed media work where lettering and painting combine seamlessly.
Are you a complete beginner?
I recommend heading to this aticle that talks more about calligraphy inks, pigments and paints for a complete beginner.

Hey! I'm Maria Montes, a Catalan-Australian multilingual, multicultural designer, calligraphy-and-type educator. My creative practice is set by the principles of never stop learning, sharing knowledge and create emotion through my work.
I have been teaching calligraphy independently since 2014. My favourite way of learning is by teaching others. I offer in-person and online calligraphy and lettering courses, corporate in-house workshops, as well as private one-to-one tuitions.